Why VPN?
Before reading this article or going through it maybe you want to know why you’re supposed to use VPN wherever you go ?
If you use one of the following on your computer/Phone/Tablet then you must use VPN
- Online Banking?
- Paying Bills?
- Purchasing online Services?
- Checking Private Emails?
- Connecting to work Email?
The list goes on and on and won’t probably end with only those, But the most important thing to acknowledge that nowadays there is absolutely nothing safe on the Internet World. Your data could be exposed, hacked at anytime anywhere and esp if you go to public Internet places e.g. (Starbucks, University, Your Friend’s home even).
So what is SoftEther VPN Server/Client?
As introduced by Softether itself, SoftEther VPN (“SoftEther” means “Software Ethernet”) is one of the world’s most powerful and easy-to-use multi-protocol VPN software. It runs on Windows, Linux, Mac, FreeBSD and Solaris.
SoftEther VPN is open source. You can use SoftEther for any personal or commercial use for free charge.

Clients
SoftEther VPN is an optimum alternative to OpenVPN and Microsoft’s VPN servers. SoftEther VPN has a clone-function of OpenVPN Server. You can integrate from OpenVPN to SoftEther VPN smoothly. SoftEther VPN is faster than OpenVPN. SoftEther VPN also supports Microsoft SSTP VPN for Windows Vista / 7 / 8. No more need to pay expensive charges for Windows Server license for Remote-Access VPN function.
Use:
SoftEther VPN can be used to realize BYOD (Bring your own device) on your business. If you have smartphones, tablets or laptop PCs, SoftEther VPN’s L2TP/IPsec server function will help you to establish a remote-access VPN from your local network. SoftEther VPN’s L2TP VPN Server has strong compatible with Windows, Mac, iOS and Android.
Download
Download the Windows Server version of Softether from the following Page:
https://www.softether-download.com/en.aspx?product=softether
Installation Requirements:
- Windows Server/Windows 10
- 4GB RAM
- 100 GB Disk
- 2 VCPU
These resources are estimated and not calculated, It’s only in case of small amount of users (Max 100 User). If you’re going to use more than that you’ll have to check depending on how many concurrent connections are there going to be.
Installation Steps:
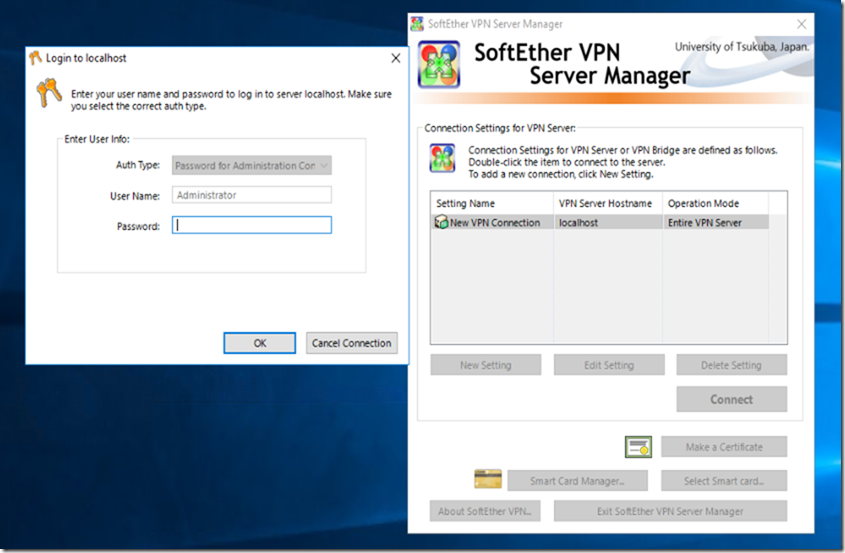
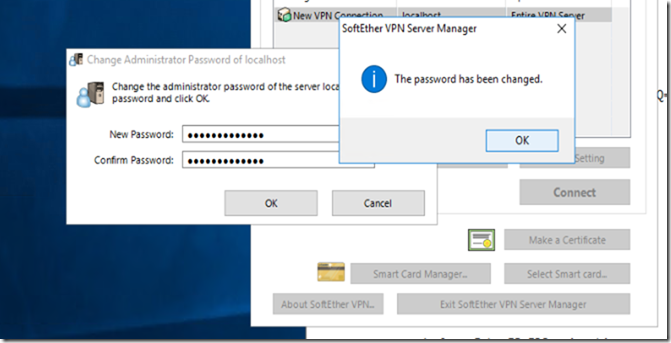
As soon as you start Softether VPN – Create new Connection and set the password for the Administrator


Configure Softether as Remote Access VPN Server
I am going to setup new Remote Access VPN Server:


This will create a new Virtual Hub, Give it whatever name you want.

If you have no Static Public IP address
Set a dynamic DNS function name, This is useful in case the IP you have keeps changing like in the case of ADSL connections at home ..etc

VPN Type:
In the IPSEC/L2TP/EtherIP /L2TPv3 Server settings, you’ll need to choose the most secure VPN connection to allow your users to safely and securely browse the internet. This needs L2TP server function to be enabled along with setting the Ipsec Pre-Shared key to provide the most secure VPN connectivity.

AZURE Settings:
If you don’t have access to Firewall to configure NAT, or configure your firewall access to the Softthere VPN Server you must enable this feature (VPN Azure Cloud VPN Service (Free) by the Japanese University of Subuka.

We have set the Azure hostname previously already so no need to change it unless you wanna use something else.

Creating Users

I will create a user, assign it to my admins group, then Create a Certificate for this user to login to make sure I have the maximum security and authentication methods offered.
Creating Certificate
Since I already have created the root certificate, I Am going to create a client certificate for this particular user from the root certificate.


Finally user is created

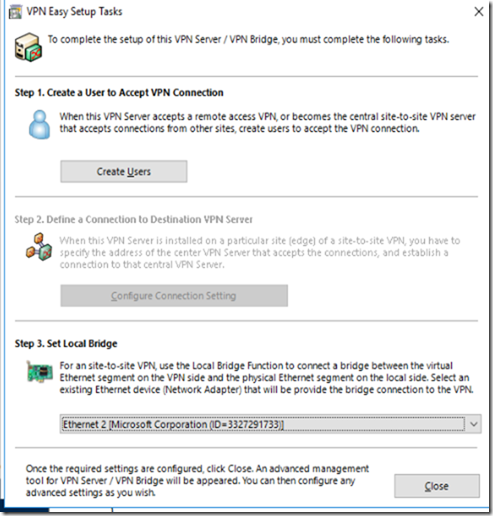
Choosing the right connection to set as Local Bridge
I need to make sure to choose the NIC which reflects my internet outbound NIC in order to connect properly (In my case it’s going to be Ethernet 2)


Using the most secure Encryption Algorithm for our connection
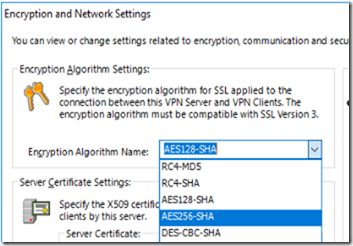
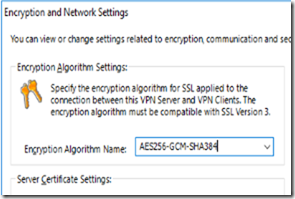
By default Softether uses AES128-SHA, while this is considered secured and used by most common VPN service providers it’s always better to use something that’s level or more secure. So we are going to change the default changes to AES256-GCM-SHA384
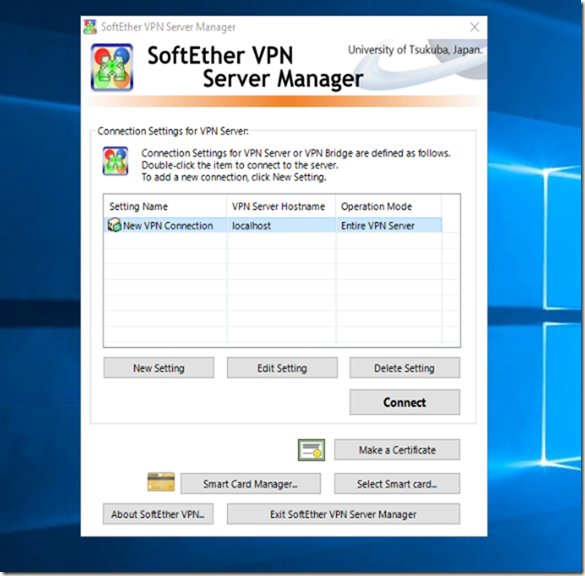
To change those settings, Navigate to the main menu of Softether VPN Server Manager and click on “Encryption and Network”
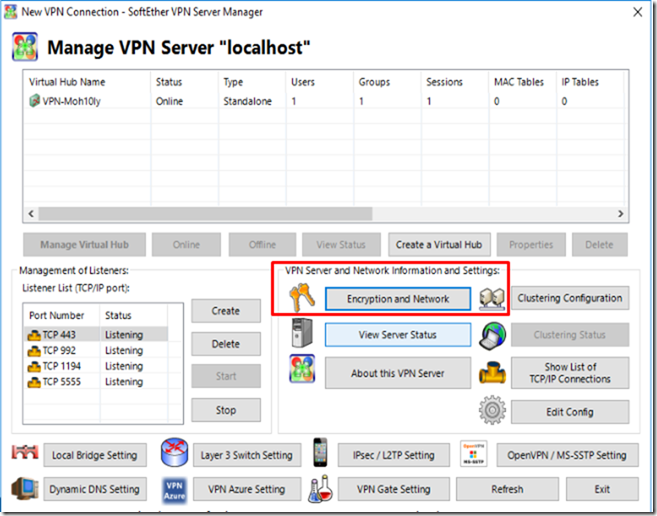
Change the “Encryption Algorithm Name:” to AES256-GCM-SHA384
AES256-GCM-SHA384 is based on the cipher suite TLSv 1.3 which is considered the most recent and secure cipher suite that’s being used right now.
Default Setting:
Change to
Client Configuration:
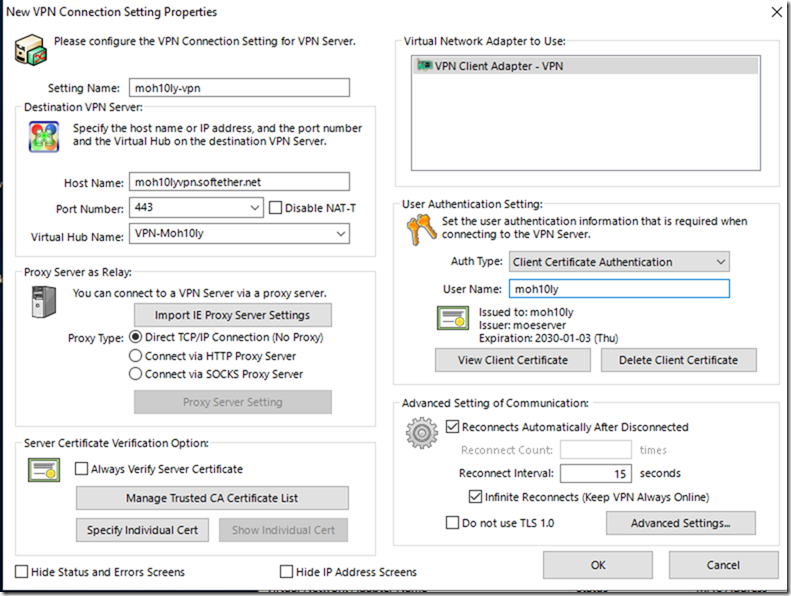
- In the setting name: we are going to enter a random name.
- The hostname: will be the name which we created previously for Dynamic IP cases. This will be useful to remember even If you have a static Public IP address.
- User Authentication Setting: We will be using the certificate which I created before (I copied this cert to my client computer where I am going to connect via the VPN client manager).
- Virtual Hub Name: Here you’ll need to copy the exact name of the Virtual Hub name which you have created on the server side.

Connectivity Test:
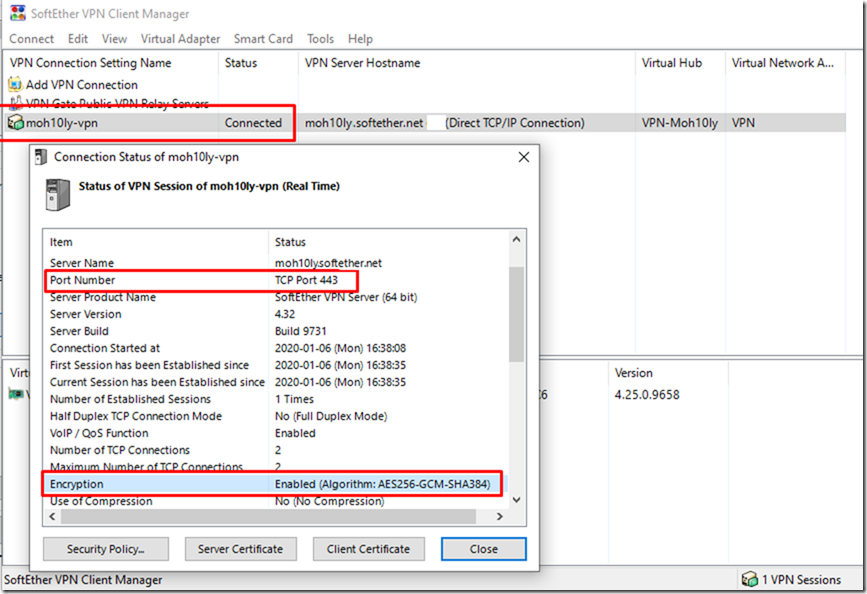
After settings everything, I am going to try and connect with my user using Certificate and the Password I set.
Ref:
https://www.softether.org/
https://wiki.mozilla.org/Security/Server_Side_TLS
https://www.softether.org/4-docs/1-manual/3._SoftEther_VPN_Server_Manual/3.3_VPN_Server_Administration#3.3.6_Listener_Ports
https://www.iplocation.net/encryption


